Bridge pose, toc
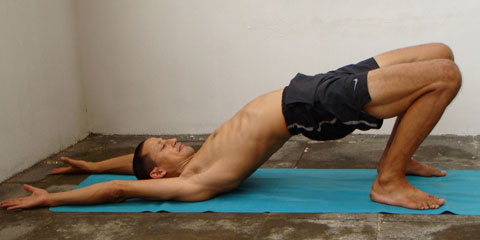
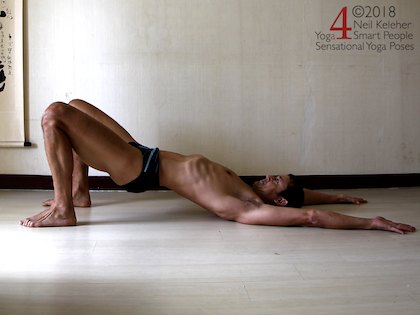
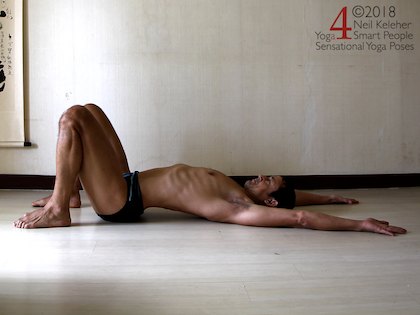
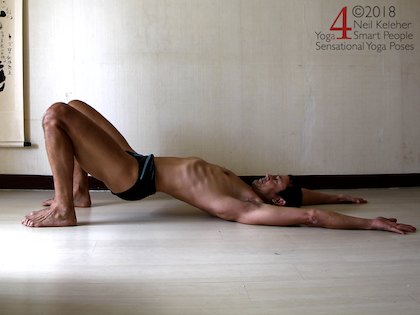
First of all, in bridge pose (I like to call it little bridge,) you lay on your back with your knees bent. You then press your hips up to the ceiling. Your shoulders and head stay on the floor.
There are several options for the hands, and which one you use can depend on what pose you intend to do after bridge pose. Or it can depend on how difficult you find bridge pose in the first place.
I like to reach my hands behind my head if I am using bridge as a preparation for wheel pose.
With your arms behind your head you can look for a feeling of opening your chest and reaching through your arms at the same time. And that is one sort of feeling you can look for when doing wheel pose.
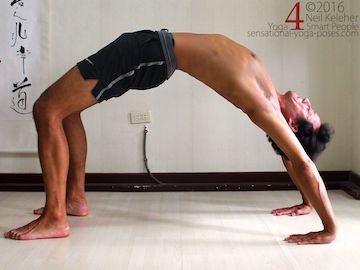
wheel
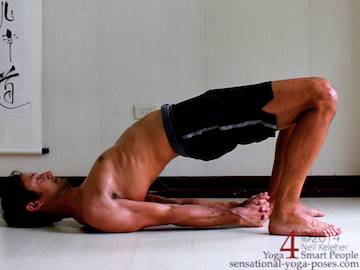
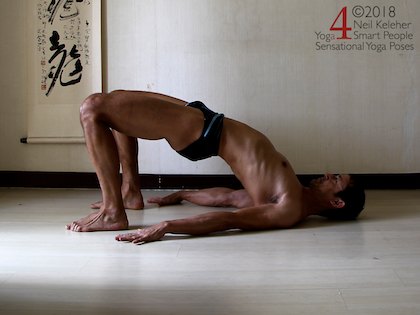
You can reach your arms towards your feet and grab your hands. In this case you can use your arms to pull your shoulder blades together and thus move the back of your ribcage upwards, away from the floor.
You may find it easier to open your chest.
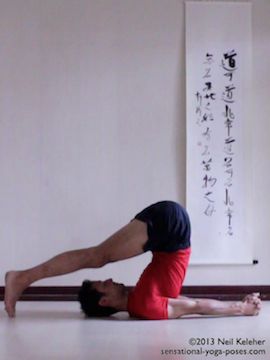
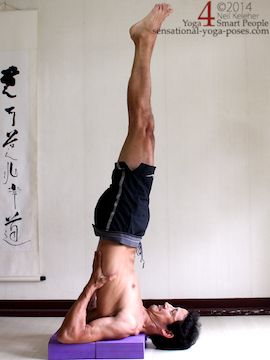
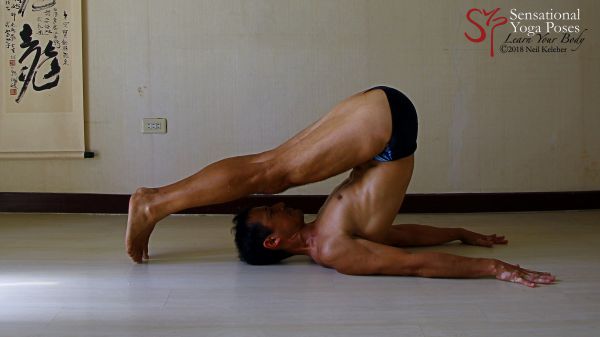
This option is a good preparation inverted yoga poses like shoulder stand and plough pose.
Another option is to reach the hands towards the feet in bridge pose with hands unclasped.
One reason for doing this is that it forces you to use your shoulders in a different way than clasping the hands. If you work at bringing your shoulder blades towards each other without clasping the hands, you use and train the rhomboid muscles.
You could then also do plough pose with hands unclasped.
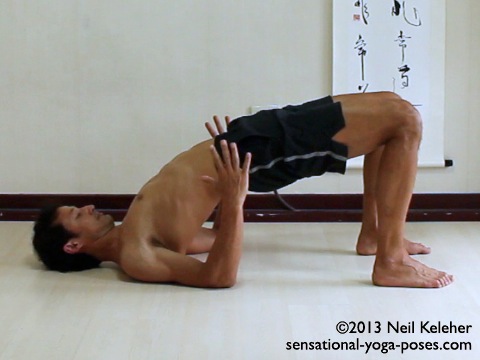
Yet another option for bridge pose is to do it with the elbows bend and forearms vertically pointing upwards. (Hands are unclasped).
Rather than using the hands to support the weight of your body (or as an option to that), you can press your elbows strongly downwards. You may find that this helps you to actively open your chest because it activates the shoulder muscles and the rhomboids.
When you pull your shoulder blades together, your shoulders move backwards relative to your ribcage making your chest appear to open.
This is different than actually lifting your front ribs and "opening your chest."
You could think of this as opening the front of the shoulders.
Or you could simply think of it as shoulder blade retraction. The opposite is shoulder blade protraction and you can read more about both actions in scapular awareness.
Lying on the floor with your pelvis lifted and with your hands clasped behind your back, you can move your shoulders a little bit towards your ears.
Prior to moving your shoulders towards your ears, you might want to tuck your chin in so that the back of your neck feels long.
This is ideally to give you the space you need to pull your shoulders towards your ears without jamming or pulling any muscles.
With your shoulders pulling towards your ears a little bit you may find it easier to move your shoulder blades together.
Now since your shoulders are on the floor in bridge pose, moving your shoulders back (or in this case down into the floor) will cause your ribcage to lift off of the floor.
Press your shoulder blades into the floor to lift your ribcage up. Relax and repeat a few times.
Now lets say that in little bridge pose you want to focus on opening your chest. How do you do that? By bending your thoracic spine and ribcage backwards.
The thoracic spine is the part of your spinal column that your ribs attach to. It's made up of 12 vertebrae.
The twelve sets of ribs attach to those vertebrae.
Although individually, the ribs and thoracic vertebrae don't have a lot of movement potential, added together, the possible movement of your thoracic spine and ribcage together is quite large. Large enough that you might start to think of your ribcage as a flexible structure.
Bending your thoracic spine and ribcage backwards is one way of getting back that flexibility or maintaining it.
One way that you can bend your thoracic spine backwards in bridge pose is to use your Spinal Erectors. To get a feel for your spinal erectors, try these spinal back bending exercises.
This group of muscles extends up the whole back of your spine from your pelvis to your head but there is one group of spinal erectors within this larger group that can be used to act specifically on the back of the thoracic spine to bend it backwards.
The feeling when these muscles are active is like you are pulling your spine into your body. Another feeling you can look for is one of pulling the backs of your ribs downwards, towards your buttocks (or at least in that general direction).
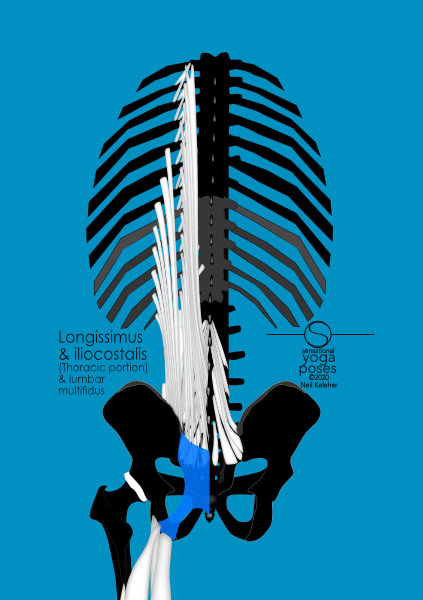
The specific muscles you are activating to generate this sensation are more than likely the longissimus and iliocostalis muscles.
The longissimus runs up from the long dorsal sacroiliac ligament and from the medial surface (inwards facing) of the hip bone near the PSIS to attach to the backs of the ribs while the iliocostalis runs up from the back of the hip bones to attach to the backs of the ribs.
Note there are sub-groupings of these muscles, not show, that run from the lower ribs to the upper ribs. These can be used to bend the ribcage backwards in relative isolation.
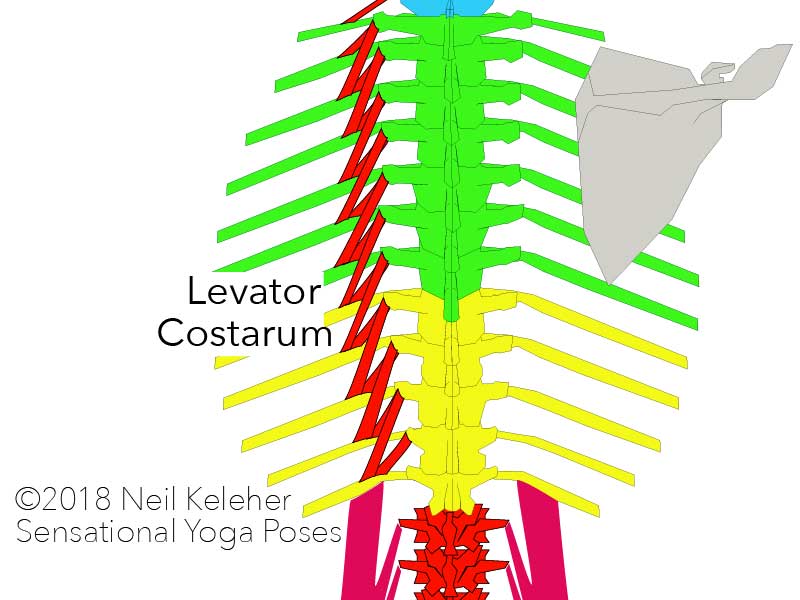
A group of muscle called the Levator costarum reach downwards from the backs of the thoracic vertebrae to the tops of each set of ribs.
These muscles are located quite close to the spinal erectors, in particular the longissimus.
These muscles can be used to lift the back of your ribs upwards towards your head. If you do this, lift the back of your ribs, you may find it easier to bend your thoracic spine backwards.
Later on I'll be talking about how to use the glutes or the quads in bridge pose. An important point in either case is understanding that muscles need a force to work against in order to activate. When there is no external force to work against, then opposing muscles can activate to create the opposing force.
When opposing muscles work against each other, this creates stability. It also generates sensation, which means you can "feel your muscles" activating.
The corollary is that if you can feel your muscles activating, assuming that it is opposing muscles they are activating against, then that's a good indication that the joint those muscles work on is being stabilized.
With the levator costarum and longissimus, because they pull on the ribs in opposite directions, they could possibly work against each other.
Note that both the longissimus and the iliocostalis can be used to create a downwards pull on the ribs. This downwards pull on the ribs can be converted into a backward bending action for the thoracic spine. To oppose this action, the obliques and intercostals may activate.
Generally, to get the feeling of bending the thoracic spine backwards, I have my students practice bending their spine backwards while sitting and then while laying down on their back.
Generally, I'll teach them to bend their lumbar spine backwards so that they can get a feel for the lumbar spinal erectors.
In general I start this all of of with tilting the pelvis forwards and backwards.
If you keep your ribcage upright while you tilt your pelvis forwards, then your lumbar spine will bend backwards. To get the lumbar spinal erectors to activate, the idea is to accentuate the lumbar back bend.
From there, getting the thoracic spinal erectors is then simply a case of carrying this sensation up the back of the spine.
If you do choose to activate your gluteus maximus in bridge pose (and personally, that's what I do), spinal erector activation may help, in particular activation of the lumbar spinal erectors and multifidus muscles ) may help.
When muscles like the longissimus, iliocostalis and multifidus activate in the lumbar and sacral region, they can help to stabilize the hip bone and sacrum.
Note that while the lower end of the aforementioned longissimus and iliocostalis attach to the sacrum and hip bones, the upper end of the gluteus maximus also attaches to the back of these bones.
With these bones anchored by the spinal erectors and multifidus, the gluteus maximus has a foundation from which it can activate more effectively to extend or backward bend the hips .
Note that you could do it the other way, activate the gluteus maximus first so that it anchors the spinal erectors. In this case you'll need to stabilize your thighs and lower leg bones so that the lower end of the gluteus maximus is anchored.
Note that the gluteus maximus has fibers that attach to the back of the thigh bone or femur. It also has fibers that attach, via the IT band, to the top of the tibia.
You can read more about the IT band in IT Band anatomy and biomechanics
Since the Gluteus maximus can act across the knee, it helps to understand the idea of knee rotation, (yes, the knees can rotate) and that the superficial fibers of the gluteus maximus help control this rotation.
To get a better idea of how to control knee rotation it can help to understand the long hip muscles each of which cross the knee and the hip joint, attach to the four corner points of the hip bone. The superficial fibers of the Gluteus maximus is one of these "long hip muscles".
To help control knee rotation, a simple action is to stabilize your feet and ankles while in bridge pose.
For more on how to do that read foot exercises
While laying on the floor with knees bent and feet flat on the floor, you can practice tilting your pelvis forwards to bend your spine backwards.
As mentioned above, getting the lumbar spine to bend backwards is easy. To bend your thoracic spine, first lift your back ribs using levator costarum. Then from there engage your spinal erectors to bend your thoracic spine backwards. (Another option is to bend your spine backwards so that you feel your spinal erectors activating, and then from there, move your back ribs away from your hip bones to see if that helps you increase the spinal back bend).
As you tilt your pelvis forwards, you can either shimmy your shoulders closer to your butt, or walk your butt and feet closer towards your shoulders.
If you can feel your spinal erectors activating when you tilt your pelvis forwards, it's easier to keep that action when actually lifting your hips.
So practice tilting your pelvis forwards and feeling your spinal erectors activate, then practice keeping that activation while actually lifting your hips.
Once comfortable with that, next practice the same actions with the hips lifted a little bit off of the floor. Relax, and then repeat it with the hips successively higher and higher.
A very simple technique for varying which muscles activate in bridge pose is to friction your feet forwards (away from your shoulders). You may find that doing this causes your quads to activate. If you do the opposite and friction your feet back, towards your shoulders, you may find that your glutes activate.
I spend whole classes teaching this frictioning technique. I generally have my students practice both with the idea that one isn't necessarily better or right. Instead, I have them practice both so that they become more "flexible" in the way that they use their body.
Note, you may not be able to get your glutes to relax, even with your quads active. I wouldn't worry about it unless it causes discomfort.
This is only a stepping stone towards better muscle control. What I then like to teach is quad and/or glute activation independent of frictioning. And that's why I talked earlier about activating the feet to anchor the glutes or activating the spinal erectors to anchor the glutes. Note that if you want to use your quadriceps in bridge pose, then a similiar process can apply. Anchor the feet or the hip bones.
Something else that can be helpful in bridge pose is understanding that you are bending both the spine and the hip joints backwards. Which do you do first?
You could bend your spine backwards first. This causes the pelvis to tilt backwards which, assuming the thigh bones are relatively still, reduces the back bend at the hips. This in turn gives your gluteus maximum some operating room so that it can effectively activate. Once the glutes activate, they can then bend increase the backward bend of the hips.
A possible option is to tilt the pelvis back so that the spine flattens. You can use the abs for this and/or your gluteus maximus. This bends the hips backwards but reduces the back bend in the lumbar spine. However, you may find that you can still bend your thoracic spine backwards.
Once you have your hips lifted as high as possible you could then, if you choose, also bend the lumbar spine back (while keeping your abs engaged).
If you have a very bendy lumbar spine, you may find this second option (bending the hips back first) more comfortable.
If you don't have any problems, I'd suggest experimenting with both.
When I first started doing yoga I would here a lot about how activating the gluteus maximus can jam up the SI joints. This could happen if the gluteus maximus is used to rotate the thighs outwards or otherwise cause the knees to move outwards when doing bridge pose. This can also happen if you do bridge pose with your feet steeply turned outwards.
A simple remedy to this is to do bridge pose with feet parallel or turned out a slight amount (vary to suit your needs).
Something else you can try doing is to resist any rotation of your thighs as you activate your gluteus maximus. You can try this with any foot position, i.e. feet parallel, turned out to varying degrees and perhaps even with them turned in.
While the gluteus maximus can be used to externally rotate the thigh, it can also be used to extend the hip joint or bend it backwards. So a question might be, how do you use the gluteus maximus in such a way that you extend the hip without causing it to externally rotate? You use your internal rotators.
To use the gluteus maximus to extend the hip without causing it to externally rotate, two muscles that internally rotate the hip are the gluteus minimus and the adductor magnus long head.
You can read more about the adductor magnus and how to activate it here: adductor magnus.
The point here is that if you can use your adductor magnus and gluteus maximus against each other, you can extend the hip without it externally rotating. You thus minimize the chance of "jamming" your SI joints.
One other thing that I forgot to mention. If you want to open you chest even more in bridge pose, use your neck. First of all lengthen the back of your neck by pulling the back of your head away from your ribcage. Then pull your chest to your chin.
Normally you pull your chin to your chest. Because of your body position in little bridge you can use the muscles at the front of your neck, most probably the sternocleidomastoid, to pull your chest to your chin.
And to close, personally I think it's fine to activate your glutes in Bridge. As Mary pointed out, they are hip extensors and why not use them to push your hips up in bridge. But do use your thighs as well.
While laying down with your arms beside your and your knees bent with feet flat on the floor, move your shoulder blades towards each other.
Tilt your pelvis forwards and arch your spine off of the floor keeping your shoulder on the floor. Focus on bending your lumbar and thoracic spine backwards. Open your chest.
With your feet under your knees so that the fronts of your shins are approximately vertical, lift your hips. Keep your spine bent backwards as you do so. Focus on using your thighs to press your feet down and your pelvis up. Feel like you are using your thighs to drill your shins vertically downwards into the floor.
To open your chest more, press your shoulder blades into the floor and open the front of your ribcage. You can keep your arms besides you or reach them over your head. In either case keep pushing your shoulder blades into the floor.
For extra fun and excitement, lift one leg off of the floor. You can keep your supporting leg in the same position or you can move both feet together before lifting one foot. Use the thigh muscles of your supporting leg to press your pelvis up. Press your bottom foot into the floor and your top foot into the sky.
Then do the other side.
For more on how to use friction to activate your muscles, check out the Frictional muscle control course. It shows you how to use friction, and pressure, to activate muscles and even how to use those to make poses like chaturanga dandasana and the splits easier to work towards. Find out more here:
Frictional muscle control
Note that another action that I use when teaching glute activation and hip control is opening the hip crease. You can read more about the hip crease, and how to open and close it here: the hip crease.
I've also designed a whole course to help students learn to feel and control their hip joints via the hip crease. You can find out more about that here:
